This is the second part of the tutorial.
There is a melody, now we’ll add a bass. First, we’ll create another sound for this. On the left of the screen is the Instrument List. There is already the default sound, called Beep, which we used for our melody.
To create a new instrument, you can either click on the “plus” icon at the bottom of the list ![]() , or right-click on the list and select “Create at the bottom”. Once clicked, a dialog opens:
, or right-click on the list and select “Create at the bottom”. Once clicked, a dialog opens:
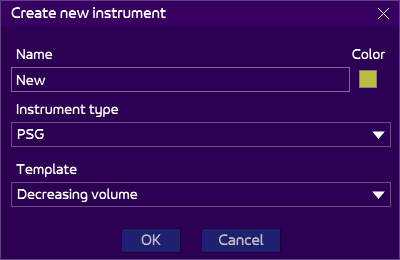
It allows you to name the new instrument (change it to “Bass”), and select a template for it: this can save you some time to have an already formed instrument which you can shape into another one. In order to learn how the thing works, select “PSG” as the instrument type, and “Decreasing volume” as the template: this will create a very short and simple sound, which we will improve. You can also select a nice color, which will show in the Pattern Viewer later.
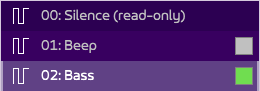
Press OK. On the left, you can now see the bass instrument on slot 2:
Double-click on it to open it in the instrument editor (IE). It looks like this:
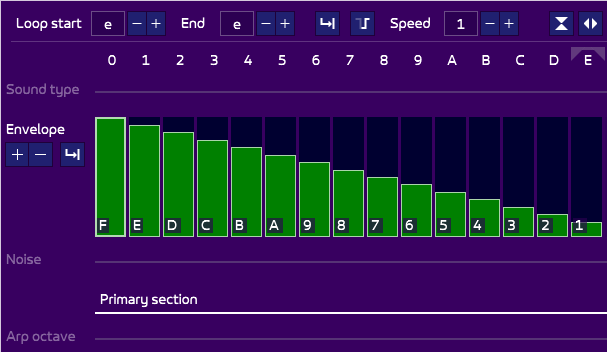
Don’t be afraid about all these bars. Press the usual qwerty keys to listen to the new sound. It is not a very exciting one.
There are several ways to edit the instrument, which are thoroughly explained in this page. We will take the less scary one: with the mouse. Let’s draw an original curve. Point your mouse on the envelope curve, press ctrl and draw a nice curve. Try to make it look like mine:

Note: like in the PV, you can Undo anything, and press del to suppress the bar where the cursor is (left-click to move it, or use the cursor).
Note also two things:
- The speed at the top-right is set to 1. The higher the speed, the slower the sound. This may sound illogical, but think of it this way: it is actually the delay between each column. Have fun and choose a speed that fits you.
- I created more columns that there was before, hence the “end” at the top-left set to 11 instead of F previously. You can create as many columns as you want. You can set the “end” to a lower value if your sound is too large, or delete the unwanted columns by locating the cursor on it (right-click on it) and pressing del.
You can use the lower octave to play it, as it is our bass after all (numeric pad - numeric pad + to change the octave, or change the octave at the top of the screen).
This should sound like this:
Rather original isn’t it? But let’s spice it up a bit. If needed, scroll down to reach the “Arp. octave” section in the primary section. Like most sections, it is collapsed (hidden) by default because there is no data in it: AT hides it to save space and make the interface less scary:

By hovering the mouse on the “Arp octave” title on the left, a small arrow appears. Click on it to show the section:
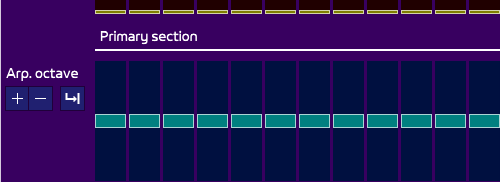
(By clicking on the arrow again, you can hide the row again). Right now there are no values. Move your cursor to the first column and change the value to octave 1:
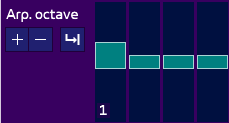
Play the sound a bit: now you should hear a nice attack with a higher octave.
You can have some fun by adding more octave change in the other columns, but I’ll leave this exercise to you. For now, let’s consider this instrument finished. Let’s use it!
Adding the bass in the pattern
Let’s go back to the PV: you can do this either by pressing F2, or pressing on the graphical shortcut icon at the top-right of the IL:

Then move your cursor at the top of the pattern, on the second track (which should be empty). Make sure the “Bass” instrument is selected in the IL, and enter the following notes, highlighted in red:
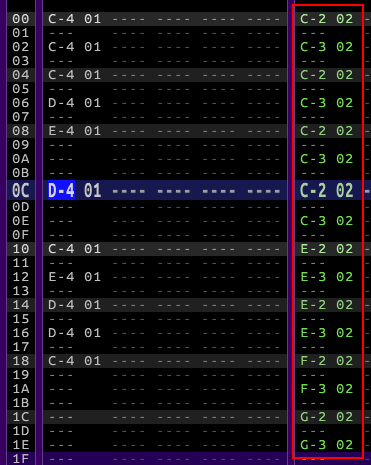
This simple bass line now makes the pattern sound like this:
So much fun! Let’s go on to the next part…